Part 1: What is CI/CD ? Simple Steps to set it up for free!
Introduction
CI/CD is a term that confuses a lot of beginners when they hear about the software deployment process.
A new developer will sometimes find that when they pushed code to production, the CI/CD pipeline stopped it in its track from wreaking havoc for the users but have no clue how it was able to do so.
We will discuss what is a CI/CD pipeline and we will also show you how to set one up for your project for free.
Having some idea of docker images would be helpful
Why do we need a CI/CD?
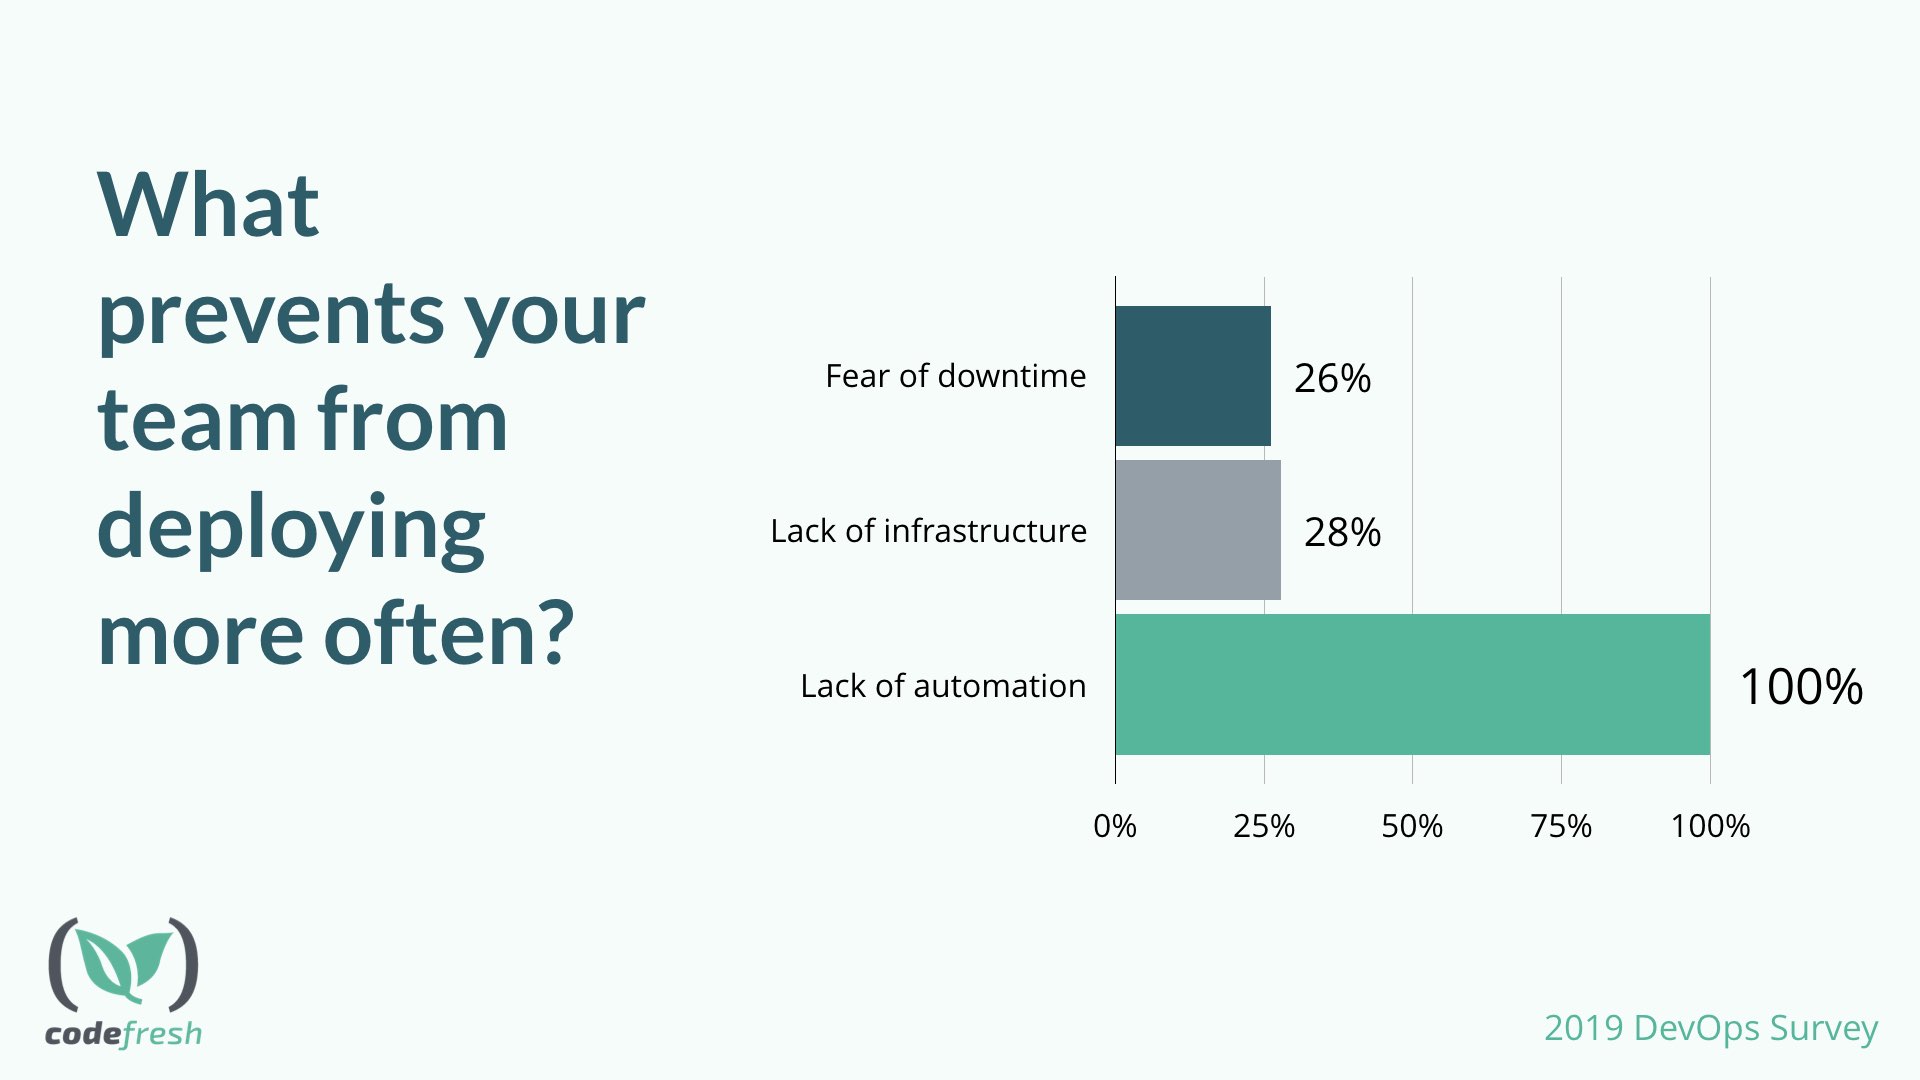
This survey shows that lack of automation is what prevents us from adding new features and speed to market.
As a Software developer, we can easily write multiple features fast. But we can not guaranty that our code works perfectly especially when we working in a team it could be that someone’s code breaks our code.
The solution is having a pipeline that will check if everything in your code works without anything breaking. If everything works then deploy the code to production.
If we break it down to the basics it just a program which we configure using a configuration file and then a function in on the CI/CD server will take your code as input and do the steps that are configured in your configuration file.
So, putting it in simple words, CI/CD is a powerful tool as it makes sure that bad code does not get merged into production and we help us to know the status of that particular code.
What is a CI/CD?
CI/CD has 2 parts
- CI - Continuous Integration
- CD - Continuous Deployment / Continuous Delivery
Continuous Integration
In this stage, your code is merged and integrated. This can be done multiple times a day depending on your team’s velocity.
This is done using your version control services gitlab, github and more
Continuous Deployment / Continuous Delivery
Here the pipeline does the major magic
Build
This mostly just checks if there are syntax errors or any simple errors. This step is also known as a sanity check stage.
Docker build is one of the most common ways to perform this. A good developer should do this stage locally as well before pushing it to any branch as good practice.
Tests
Automated tests for your specific language run in this stage.
This stage tests if your code is working as intended and if you follow good coding practices this will be the stage that will fail the most.
Deployment
This is pushing your code to your deployment. We will use Kubernetes in this example
For every new push, the whole pipeline runs from the start again.
If any stage fail’s it will fail pipeline
For each integration, the pipeline runs from the start
Let us set it up!!
We will use the free CI/CD provided by Gitlab
For your CI/CD pipeline to work all you require is to add a .gitlab-ci.yml file. Gitlab will use this file to configure its gitlab-runner.
You have a multistage pipeline in which for each stage you can have multiple jobs
Specifying your stages
stages:
  - build
  - test
  - sonar-testing
  - stage-deploy
This is one of the first things you will have in your file (if you look at my file the other thing are the variables to run docker in docker)
Configuring
Each job starts as a clean install of your base docker container. The base image will be the docker images that is base of your project example python:3, node:latest, ruby:2.5, etc
The main point of having a base image is so you can install the requirements either having them in your base image or installing them in your container so you can run your script
Once you have your base image you install the requirements and your authentication in your before-script
What actually happens
when you push your code with a .gitlab-ci.yml file Gitlab gives the task for one of it’s shared runner. They are free and they run the pipeline.
Once everything required to run your job is installed in your shared runner, it will run your script.
Here is the example of a build stage
build:
  stage: build
  image: docker:stable
  services:
    - docker:19.03.0-dind
  before_script:
    - docker login -u $CI_REGISTRY_USER -p $CI_REGISTRY_PASSWORD $CI_REGISTRY

  script:
    - docker build -t $CONTAINER_RELEASE_IMAGE .
    - docker push $CONTAINER_RELEASE_IMAGE
Here first the stage will run before_script, login and then run the docker commands in script
I have enclosed the complete .gitlab-ci.yml file here
Part 2: To be released
Part 3: To be released
I also gave a talk about the same at DSC OMG
Next article would be how to integrate static and dynamic testing in your CI/CD pipeline
